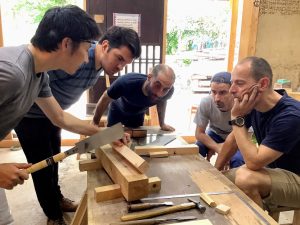
One of the most important tool is the Nomi (chisel). Here, I will give a brief overview of setting and sharpening a brand new Nomi (chisel).

Tools you will need:
- File – Round or Half Round
- Hammer
Plus you will need some sharpening stones (from left):
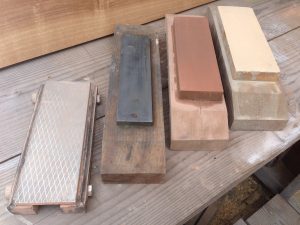
1. Diamond Stone – To maintain the flatness of the water stones.
2. Metal Plate – To flatten the backside of the blade.
3. Water Stone Medium (#1000 grit) – To sharpen the blade.
4. Water Stone Finish (#6000 grit) – To give a fine finish.
Setting the Ring
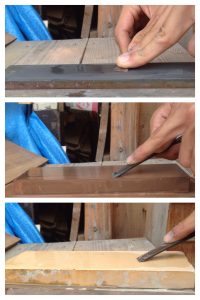
Before you can start hammering away your new nomi (chisel), it first has to be set (from top left):
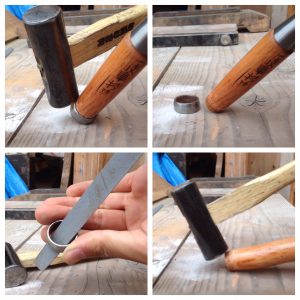
1. First, take off the ring. You may be able to get it off using only your hands. If not, give it a little nudge with a hammer.
2. The ring should easily come off.
3. File the edge of both ends of the ring.
4. Hammer the edges of the wooden handle.
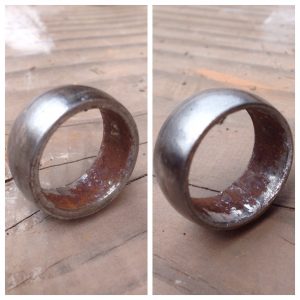
How the filing should look (left: before, right: after).
This is done to allow the ring to move down the handle as it gets used.
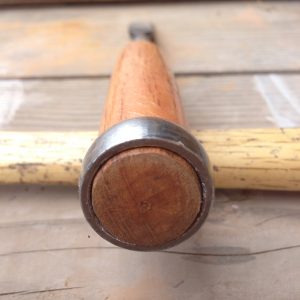
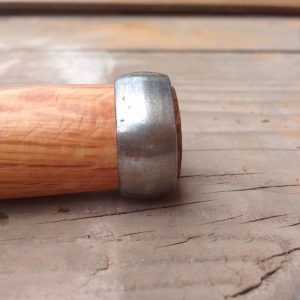
Lastly, hammer the ring into the handle. Now you’re done setting the ring. Make sure the handle extends beyond the ring.
Sharpening the Blade:
Flattening the backside
First, we have to make the back of the blade entirely flat. This is important as it is the back side which determines the accuracy.
Make sure the backside is laid flat against the metal plate (from top left):
1. Add 2 to 3 drops of water on top of the metal plate.
2. Spread the water across the plate.
3. Next, start moving the blade up and down the plate while applying power.
4. Continue moving it up and down until the moisture dries up.
5. Repeat the process until the back becomes shiny (below).
*When sharpening, press down on the blade with both hands. (left hand was on the camera).
 From left:
1. Before any sharpening.
2. After a few times – You can see the parts which are level (shiny).
3. Continue pressing out the back until the whole surface becomes level.
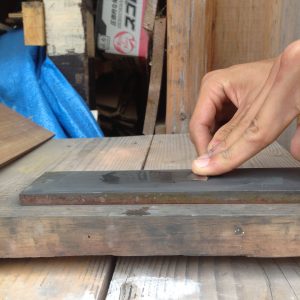
Sharpening
Soak the stone in water for at least 5 minutes before sharpening. When sharpening, the stone should constantly be wet.
Maintain at an angle between 20 to 30 degrees. The angle depends on the type of the nomi you are sharpening. A thicker blade should be sharpened with a steeper angle and vice versa.
Do not apply any downward force. The left hand should act as a guide. Applying excessive force results in a slanted tip.
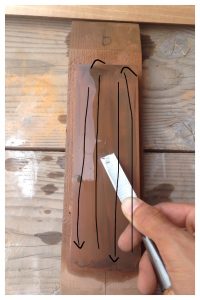
When sharpening, move the blade up and down the stone but also sideways. Try to use the whole surface of the stone as this allows the stone to diminish at an even rate.
Remember to keep the stone wet.
Make sure the tip of the blade is sharpened.
Finishing
The last step is to finish it off. If the blade is not properly sharpened in the previous stage, this step will be difficult.
The sharpening method is the same as above and sharpen until the surface is polished.

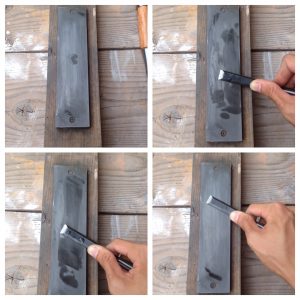
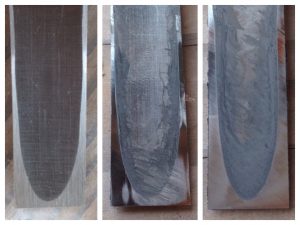
From left:
1. Before any sharpening.
2. After the middle stone stage.
3. After the finishing stage. The surface should be polished.
Quick recap:
From top:
1. First “push” out the backside.
2. Using the middle stone, sharpen the blade.
3. Finally, finish it off with the finishing stone.
Tips:
- There is no “right” posture for sharpening. Find one that best suits you.
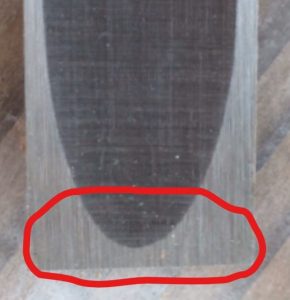
- Push out the back side occasionally and make sure the bridge (circled in red, below) between the two sides do not disappear.
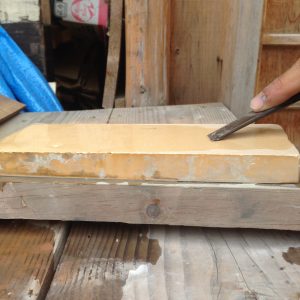
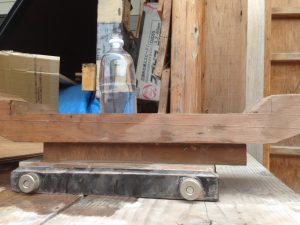
- Make sure you frequently flatten out the sharpening stone on the diamond stone. Place the stone above the diamond and move it up and down (pictured below). It is crucial to maintain a flat stone in order to sharpen a blade straight.
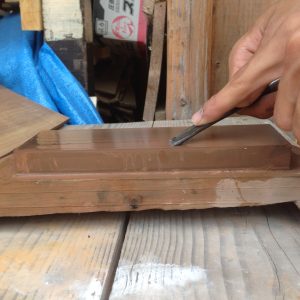
- If the backside takes a long time to come out, rub the medium stone on to the metal plate (similar to the pic below).
Happy sharpening. There will be times when it will get dull or frustrating, but bear in mind that a sharp tool is the most important. If it makes you feel better, some trade schools in Japan spend up to the first 2 months training sharpening skills (sharpening over and over again. very dull).
If you have any feedback, question, or topics you would like featured, kindly leave a comment below.
At Suikoushya, we share traditional Japanese woodworking techniques and skills. Since it is a small group system, we will provide guidance tailored to each individual’s skills, from beginners to woodworking professionals. Please join us!
I look forward to sharing fine woodworking with you.
One month Japanese woodworking classes