Here’s a very rough guide to make a Kanawa Joint. In this blog I will outline the basic woodworking methods used to make this joint. I will publish another blog for writing the lines later on.
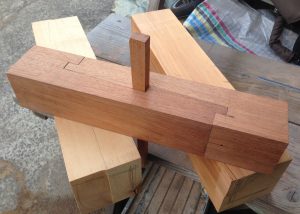
This joint not only looks cool but is useful. Unlike most other joints, this can be used to join two vertical parts together such as for the post. Sometimes, you will see this joint being used in the “Tori” of Shrines; to replace the bottom part of the legs.
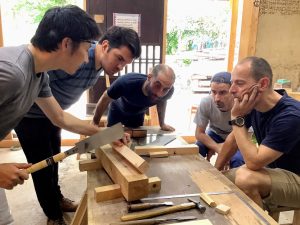
If you’re new to woodworking, this joint may not be the best one to start off with. Making this will require accuracy, patience, and some skills.
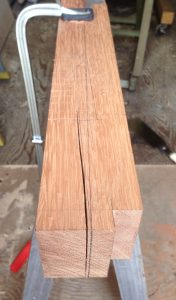
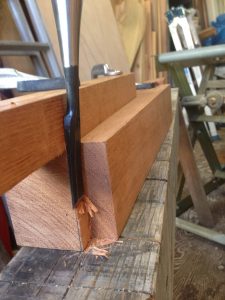
First, saw off all the unnecessary parts. Make sure you leave a little space from the line. I would say between 1 to 5 millimeters depending on how much confidence you have in your sawing skill.
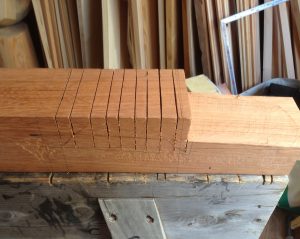
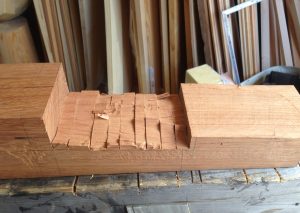
For the inside section, saw it into many slices (imagine slicing a loaf of bread). Make sure to stop sawing right before the line. Once done, use a hammer to hammer out the the sliced bits.
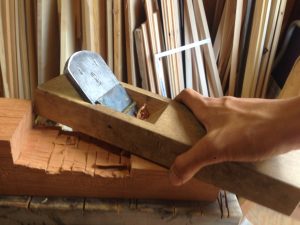

Now, the top part can be shaved off until the lines on the side using a Kanna. Make sure to check if the surface is level. Making the surface a little concave shaped (the edges higher) is also acceptable.
In the picture on the right, you can see the middle is still high. In this case I would shave off more of the middle area to make the surface flat.
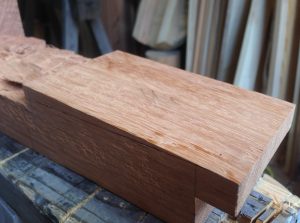 The upper bit done. It should hopefully have a smooth, flat surface.
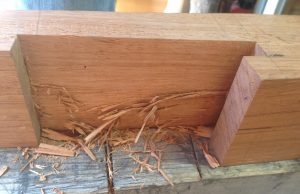
For the lower, inside part, use a Nomi (chisel). First smoothen out the hilly surface that was hammered out.
Using a guide (more below) finish off until about half-way, then flip over and finish it from the other side.
When using a Nomi, it is highly recommended you use a guide (a piece of wood clamped on to the material). Not only does it becomes easier to use a Nomi, it also makes the work near flawless.
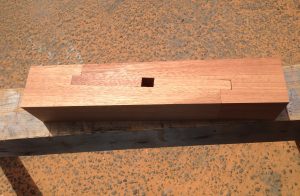
 Finish off the other parts and you’re done with one side.
Next, repeat the same proccess for the other side.
Once the other side is completed, try fitting it together. It will probably require minor adjustments to get it to fit. Once you are satisfied with the fit, use a Kanna to finish off all sides. This cleans the ink and also gets rid off any unevenness between the two materials.
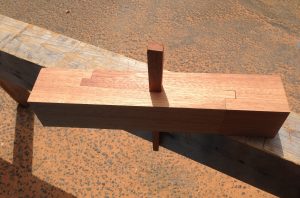
Lastly, make the stopper and fit it in. All done!
At Suikoushya, we share traditional Japanese woodworking techniques and skills. Since it is a small group system, we will provide guidance tailored to each individual’s skills, from beginners to woodworking professionals. Please join us!
I look forward to sharing fine woodworking with you.
One month Japanese woodworking classes