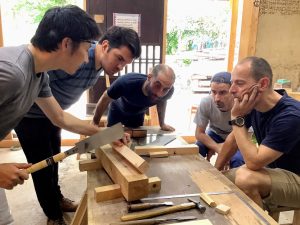
Hello! I am Takami Kawai, a Japanese carpenter. I enjoy woodworking at the Suikoushya in Kyoto. In addition to repairing shrines and renovating old houses, we share fine woodworking with people, hold woodworking classes around the world, and hold joinery solo exhibitions.
Today, I will explain the theme “Making a Sharpening Stone Base”. have fun!
Using only wood joinery (without nails or glue).
Today, i would like to make a base for sharpening stones.
Here is sketch for todays project. Basically, it is a box which holds the sharpening stone above it.
The materials here all have the line marked. The first thing to do is to make the mortise. The mortise should be done when the material is in its most stable(longest) state. Two longer pieces will be joint to two smaller pieces.
First, chisel the perimeter (all four sides) of the mortise. Hammer the NOmi (shisel) a little inside of the line. If the Nomi is laced right on the line, the Nomi will bite into the line. This means the Nomi will go past the line. Once the perimeter is outlined, “scoop” the wood. Work the Nomi “across the grain” first, then work it “along the grain”. Once a little space is dug, it can be chisel until the line. Having a clean finish in non-visible areas, helps create a stronger joint. If gaps exists when assembling the parts together, Overtime, that area will become loose.
Always remember to use a Nomi which is smaller than the mortise A Nomi the same size as the mortise should not be used either.
For the mortise, dig halfway from one side, then the other half from the other side. The Nomi works better when used along the grain. However with a mortise this small, the Nomi will touch(and ruin) the edge. Therefore, it is necessary to use the Nomi against the grain. Slowly dig from all sides. At this point, give it a little clean. For the other side, saw the lines first. Sawing an extra line in between will make it easier to chisel the wood out. Saw a little inside of the line. Be careful not to over saw the line. First dig the mortise. Chisel the wood out little by little. When working on grooves, work from both sides. The same as when working on a mortise. Half from one side, then the other half from the other side. Working from only one side will lead to the wood being torn off. Check to make sure there are no high spots. Clean any rough parts.
Bonus Pro Tip
The easiest way to get clean results is to use a piece of wood as a guide for the Nomi.
We will make the groove to hold the sharpening stone.
Line a piece of wood to use as a guide. Align the wood with the marking line.
First, slice the Nomi to mark the line. Chisel out the wood using the Nomi(chisel). Chisel a little at atime. Being greedy and chiseling in one go will tear the wood out. Work from both sides. Be careful not to go past the line. Leave some space from the line.
Once the majority is chiseled out, prop the wood up. Clamp down the wood guid.
Slice the wood using a guide, Make sure the back of the Nomi(chisel) is in full contact with the guide. Make sure not to slice too much at once. Since a thin layer and slowly move towards the line. Applying too much pressure when slicing will leave a mark on the material. Slice little by little from both sides.
Check the work and clean if necessary. Repeat the process for the other piece, With this the length of the base is completed.
Chiseling the mortise for the wedges. Be careful as one of the sides is at an angle. Chisel out bout halfway then flip over.
Nest is the tenon.
One way to cleanly saw is to use a guide. Make sure not to saw past the line.
Another way is to saw, then clean it off using a Nomi(chisel).
Now for the wedge. Saw the wedge, Make sure the wedge is at least double the desired length. Leave some space from the line when sawing.
Use a Kanna(hand plane) to shave until the line. Make sure the edges of Kanna is at aright angle. Use the Kanna on top of a table. Place a piece of wood under the wedge(Without this, the blade will not touch the wedge). When shaving , go along the grain. Shaving the other direction will result into tear outs. Take the edge of the parts which will fit into the joint. It better to have the joint a little tight. To make the joints slide in easily, hammer the surface of the wood. Don’t apply strenght when hammering. Instead, use the weight of the hammer. It is important to evenly hammer the surface. If the fit is too tight, the wood will split. so make sure the wood is properly hammered. The hammered area will expand with water, creating a clean , tight joint. Lightly tap the wedges in. Tightening the wedges too tight will force the wood to split.
Next, mark the cutting line for the wedges. The length of the wedge is up to you. With this , the fitting is done.
Saw to the marked length.
Once its fit, take the edge off the area where the stone will come on.
Completed!
At Suikoushya, we share traditional Japanese woodworking techniques and skills. Since it is a small group system, we will provide guidance tailored to each individual’s skills, from beginners to woodworking professionals. Please join us!
I look forward to sharing fine woodworking with you.
One month Japanese woodworking classes

